Use the following instructions to configure workstations prior to launching Engagement Manager. Completing these steps ensures optimal performance for your application.
If you experience issues in Engagement Manager, complete this setup to ensure that all settings are configured correctly. In some instances, Microsoft Office updates, internet browser updates, and a reset of your internet browser can cause settings to be removed.
If you're still experiencing issues after completing these steps, the Troubleshoot common workstation issues article provides answers to common issues that you may encounter in Engagement Manager.
Configure your internet options
You'll need to set up the following internet options for
Engagement Manager
to work properly.
Select the search icon next to the Windows Start button and enter
Internet Options
.
Select
Internet options
from the menu.
Go to the
General
tab:
Select
Settings
from the
Browsing history
section.
On the
Temporary Internet Files
tab:
Select
Every time I visit the webpage
, then
OK
.
Select
Delete
from the Browsing history section.
Mark the
Temporary Internet Files and website files
and
Cookies and website data
checkboxes and clear every other option.
Select
Delete
.
Go to the
Security
tab:
Select
Trusted sites
, then select
Sites
.
Clear the
Require server verification (https:) for all sites in this zone
checkbox.
In the
Add this web site to the zone
field, enter
*.thomsonreuters.com
,
*.engagementmanager.thomsonreuters.com
,
*.onvio.us
and
*.gofileroom.com
, then select
Add
.
Re-mark the
Require server verification (https:) for all sites in this zone
, then select
Close
.
Select
Custom level
.
In the
Reset custom settings
drop-down list, select
Low
, then
Reset
.
In the
Settings
list, enable
Display mixed content
, then select
OK
.
Go to the
Advanced
tab:
Mark the
Use TLS 1.2
checkbox.
Select
Apply
, then
OK
.
Set up Google Chrome
To access GoFileRoom, Engagement Manager and Guided Assurance, each user's workstation must first be configured prior to their first sign in. Engagement Manager is not supported on Microsoft Edge. We recommend that you use Google Chrome.
Before you open Engagement Manager with Google Chrome, you need to configure the browser. Engagement Manager uses notifications, pop-ups, and redirects that Chrome can block automatically.
Open Google Chrome.
Select to open the Chrome menu, then select
Settings
.
Open
Privacy and security
, then select
Site Settings
.
You can allow:
Notifications from [*.]engagementmanager.thomsonreuters.com [*.]onvio.us [*.]gofileroom.com [*.]thomsonreuters.com. This enables notifications to pop up when the user’s sign-in session is about to time out.
Additional permissions: Automatic downloads from [*.]engagementmanager.thomsonreuters.com [*.]onvio.us [*.]gofileroom.com [*.]thomsonreuters.com. This helps when viewing and editing documents.
Pop-ups and redirects from [*.]engagementmanager.thomsonreuters.com [*.]onvio.us [*.]gofileroom.com [*.]thomsonreuters.com. This allows files to be opened from Engagement Manager.
Engagement Manager with Microsoft Edge
Use these steps to set up Microsoft Edge for Engagement Manager.
important
We don’t support using Microsoft Edge with Engagement Manager. At this time, there is
no
internal testing in the Microsoft Edge browser or any guarantee that all functionalities will work in the Edge browser. We recommend that you use Chrome as the default internet browser on your workstation.
Open Microsoft Edge.
Select to open the browser menu and select
Settings
.
Select
Cookies and site permissions
, then
Manage and delete cookies and site data
.
In the
Allow
section, select
Add
.
Enter each site and use
Add
to save:
[*.]engagementmanager.thomsonreuters.com
[*.]onvio.us
[*.]gofileroom.com
Select
Cookies and data stored
to go back to the previous screen, then
Notifications
.
In the
Allow
section, select
Add
.
Enter [*.]engagementmanager.thomsonreuters.com and select
Add
.
Select
Site permissions
to go back to the previous screen, then
Pop-ups and redirects
.
In the
Allow
section, select
Add
.
Enter each site and use
Add
to save:
[*.]engagementmanager.thomsonreuters.com
[*.]onvio.us
[*.]gofileroom.com
Install GoFileRoom Add-In
If you have administrative privileges, you can follow these steps to install the GoFileRoom Add-In.
important
Prior to installing the latest GoFileRoom Add-In, verify that the prior version has been uninstalled. GoFileRoom functionality may be hindered if multiple versions of the Add-In are installed on the same machine.
Microsoft .NET 4.0 Framework (or higher) must be installed on your machine to use the GoFileRoom Add-In.
To install the GoFileRoom Add-In:
If .NET 4.0 Framework (or higher) is not installed, download and install Microsoft .NET 4.0 from the Microsoft website.
Select your name on any GoFileRoom screen, then select
GoFileRoom Add-In
from the dropdown list.
After it downloads, right-click the
GoFileRoom-Add-In.exe
file, then select
Run as administrator
.
The InstallShield Wizard will guide you through the remainder of the installation process. Select
Finish
to complete the installation. Select
Yes
to restart your computer.
(Optional) The GoFileRoom Add-In lets you make a customized installation and control what components are going to be installed. While it’s recommended to perform a Complete installation, the Custom install is available for certain situations.
note
The InstallShield Wizard provides you with the option to install all the components of the GoFileRoom Add-In at once, or to choose which components to install.
Terminal Server Add-In installations are required to be run at the console as an Administrator.
These are the commonly used features of the GoFileRoom Add-In:
Adobe Acrobat integrates GoFileRoom and Adobe functionality.
ControlPanel simplifies uploading and managing your files in GoFileRoom.
Microsoft Office integrates GoFileRoom and Microsoft Word and Excel functionality.
QuickLaunch lets you quickly launch and use GoFileRoom without having to sign in each time.
If licensed, ScanFlow fully integrates with GoFileRoom. ScanFlow leverages 100% accurate barcode and indexing features to scan large batches of documents quickly and accurately.
note
GoFileRoom supports the current and one prior version of the Add-In. If your firm experiences any issues, make sure your users have the latest version of the Add-In installed.
There are 2 alternatives to perform the installation in silent mode:
Install the Engagement Manager Add-ins to use the functions that integrate with Microsoft Office applications.
note
We support the current and one prior version of the client add-in. If your firm experiences any issues, make sure you have the latest version of the client add-in installed.
Find which version of Word or Excel you have installed:
Open either Microsoft Excel or Word.
Select
File
and choose
Account
.
Select
About Excel
or
About Word
.
Note if the version is 32-bit or 64-bit.
Open Engagement Manager.
Select
Setup
, then
Downloads
.
In the Add-Ins section of the Downloads screen, choose the Office Client Add-In with the version that matches your installed version.
The purpose of the Engagement Manager Link is to interact with other applications installed on your local computer. This includes:
Signing into the Engagement Manager Client Office Addins seamlessly when signing into Engagement Manager.
Launching the SMART Practice Aids application to set up a new engagement, edit an existing engagement, or edit a smart document.
Opening a new Outlook message if you are right-clicking on a document and choosing to email via Outlook.
Choosing
Add Workpaper
from Guided Assurance, when you subscribe to the desktop version of Checkpoint Tools, or rolling forward Checkpoint Tools documents using the desktop version.
To install the Engagement Manager Link:
Open Engagement Manager.
Select
Setup
and select
Downloads
.
Select
Engagement Manager Link
and download the installation file.
Select the installation file to run it and follow the steps in the wizard to install the Engagement Manager Link.
note
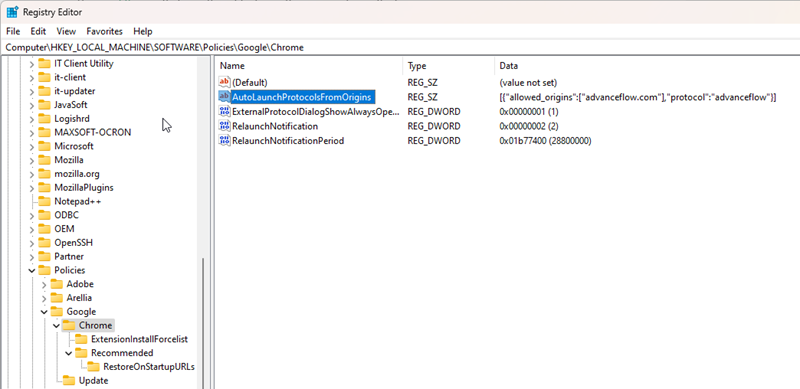
When signing into Engagement Manager, or performing any of the actions in the application, you may receive a security prompt from your web browser asking permission to
Open Engagement ManagerLink
. Mark the
Always allow demo.engagementmanager.thomsonreuters.com to open links of this type in the associated app
checkbox, which will prevent you from seeing this window regularly. None of the functionalities will work if you ignore or cancel the window.
Install the Dynamic Web TWAIN scanner
install the Dynamic Web TWAIN to scan workpapers into an engagement binder.
Open Engagement Manager.
Select
Setup
and select
Downloads
.
Select
Dynamic Web TWAIN
and download the installation file.
Select the installation file to run it and follow the steps in the wizard to install the tool.
On the Optional add-on features for Web TWAIN SDK screen, leave the fields blank and select