![]()
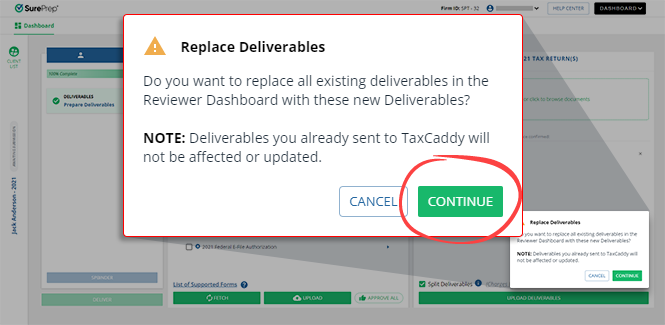
Triva isn't available right now.
Check out the support page for our phone number and hours
![]()
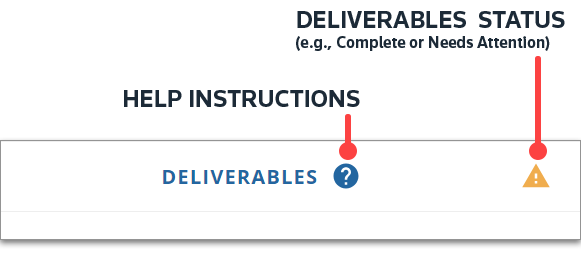
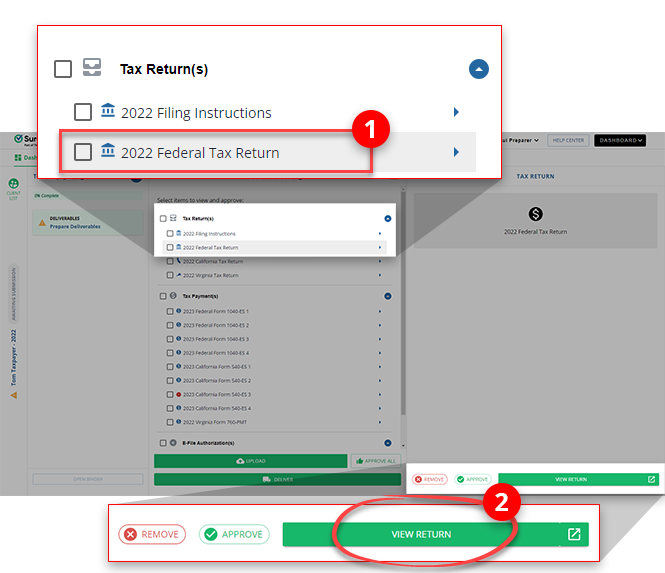
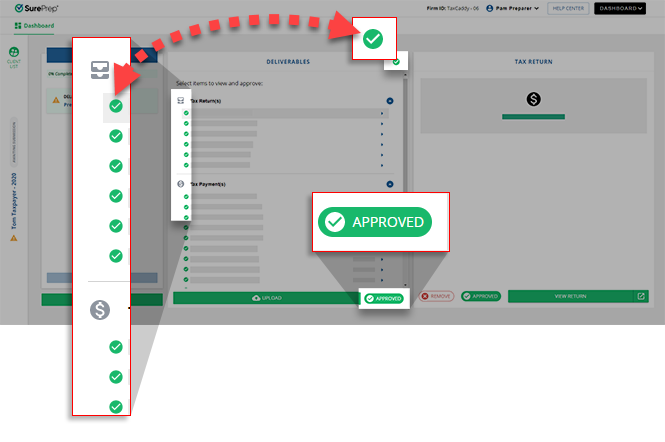
Status | Description |
|---|---|
 | Complete
Deliverables have been approved (or sent) to the client's profile in TaxCaddy. |
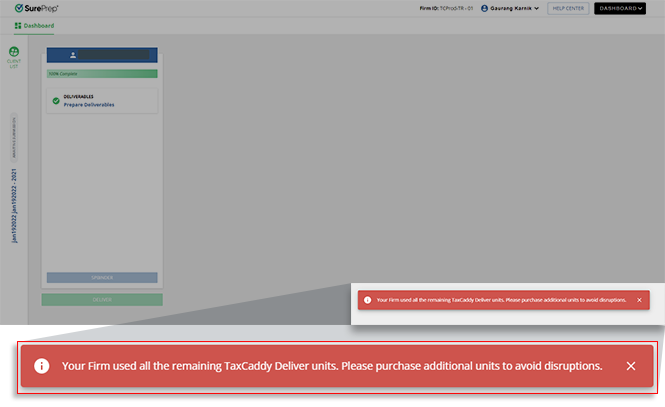
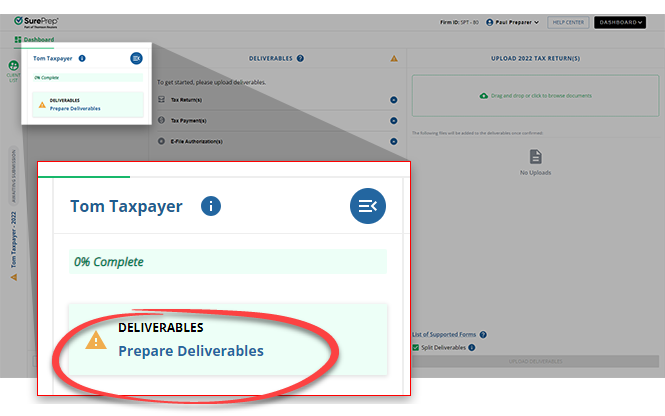
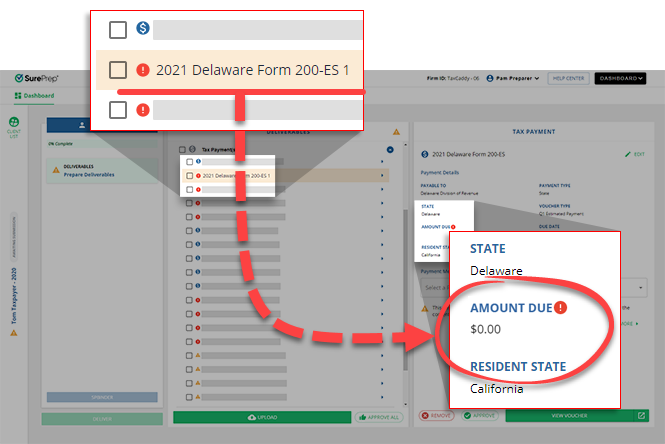
Attention
Deliverables haven’t been fetched or approved for delivery.
|


Method | Description |
|---|---|
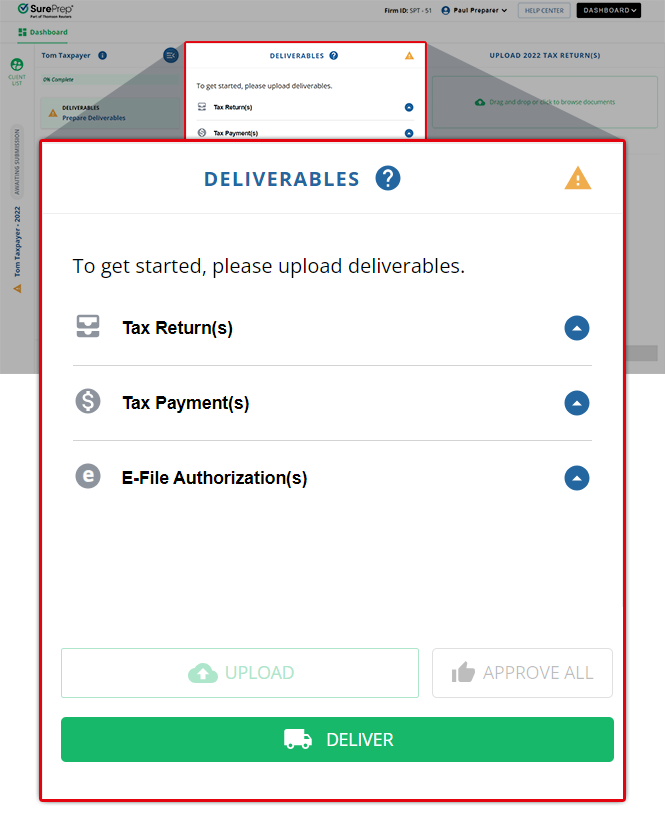
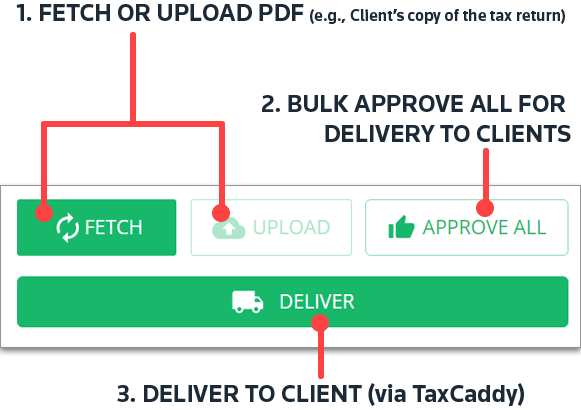
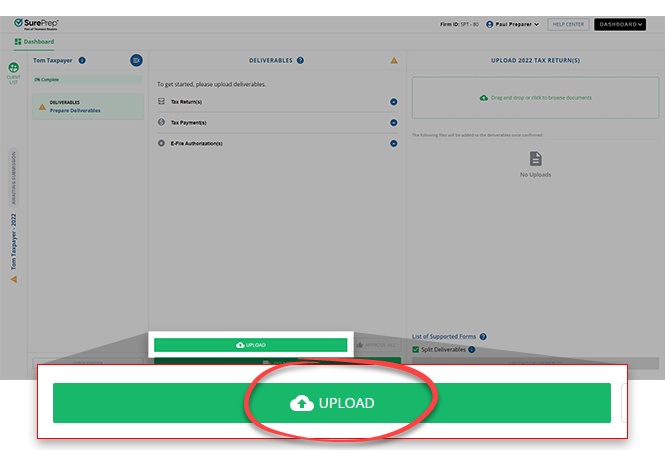
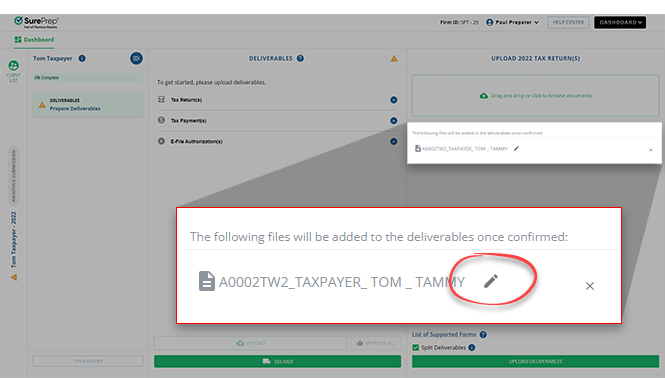
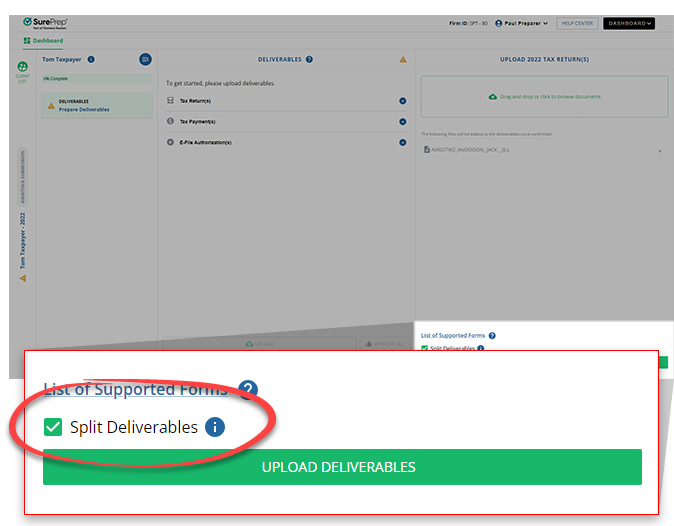
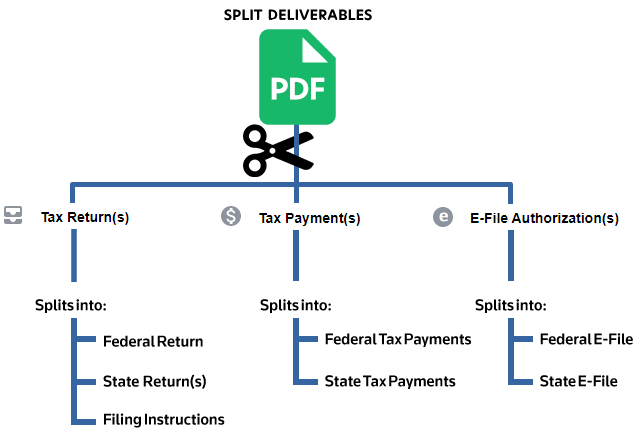
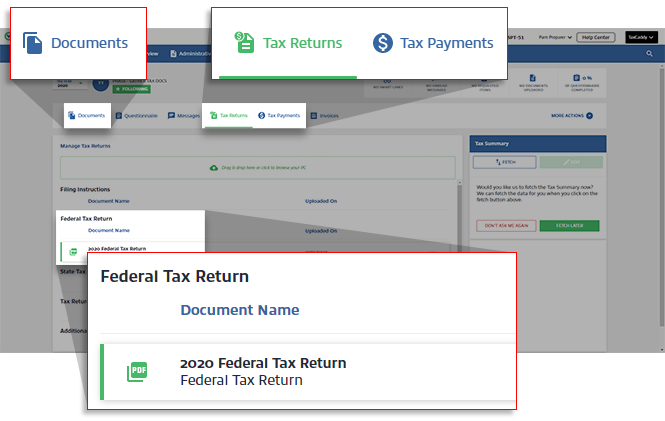
UPLOAD | You can upload a Client's Copy of the tax return and let SurePrep split the document, process it, and prepare it for delivery to your TaxCaddy client. When uploading the tax return, you can select Split Deliverables (One Click Split) to automate the process of splitting deliverables into individual documents. SurePrep supports uploading deliverables for all supported tax software. |
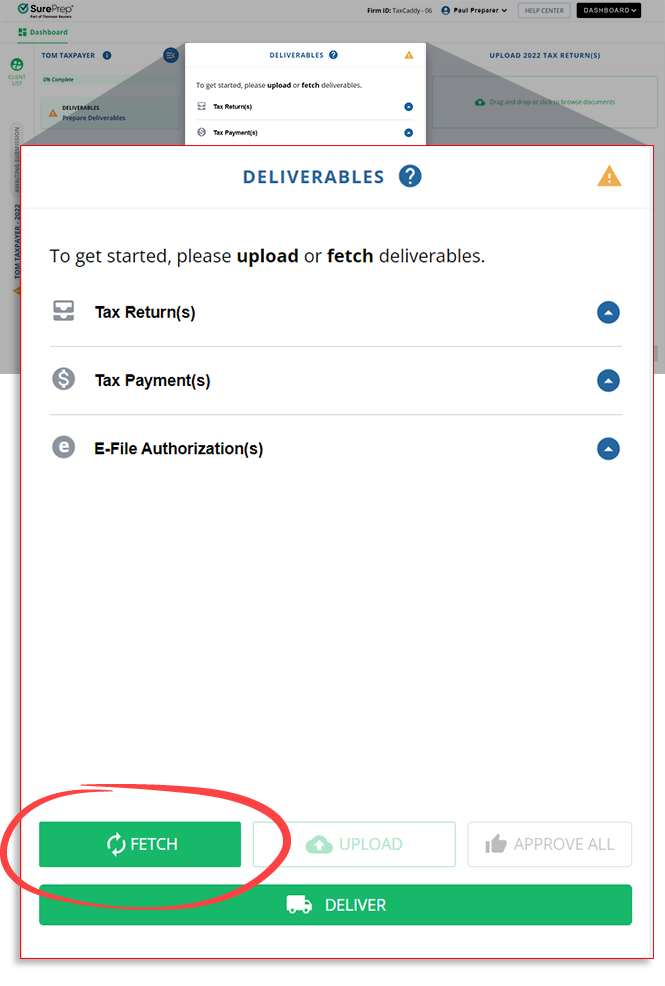
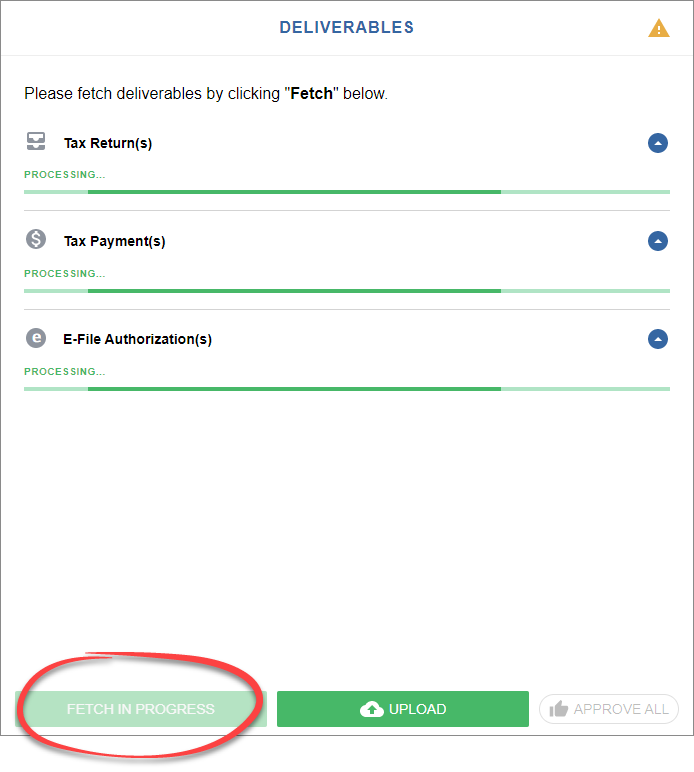
FETCH | Firms using GoSystem Tax RS, UltraTax CS, and CCH Axcess Tax (with an API license to print tax returns) have the option to fetch deliverables in Reviewer Dashboard , aside from uploading them. Instead of uploading a PDF, you can skip a few steps and save time by automating the document delivery process. |


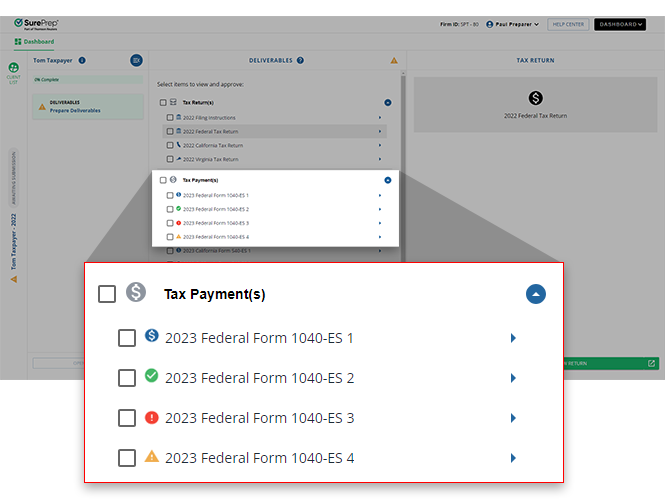
Status | Description | |
|---|---|---|
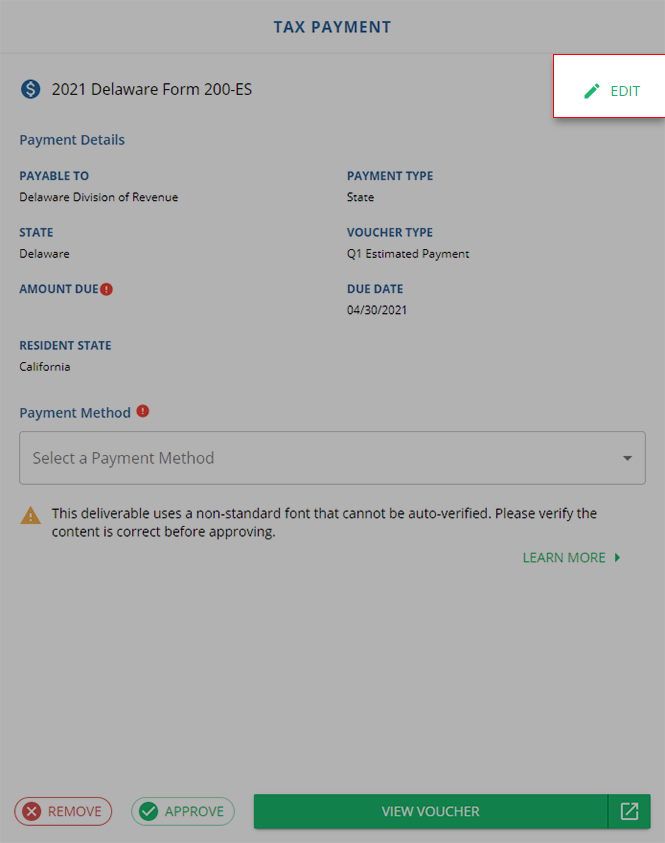
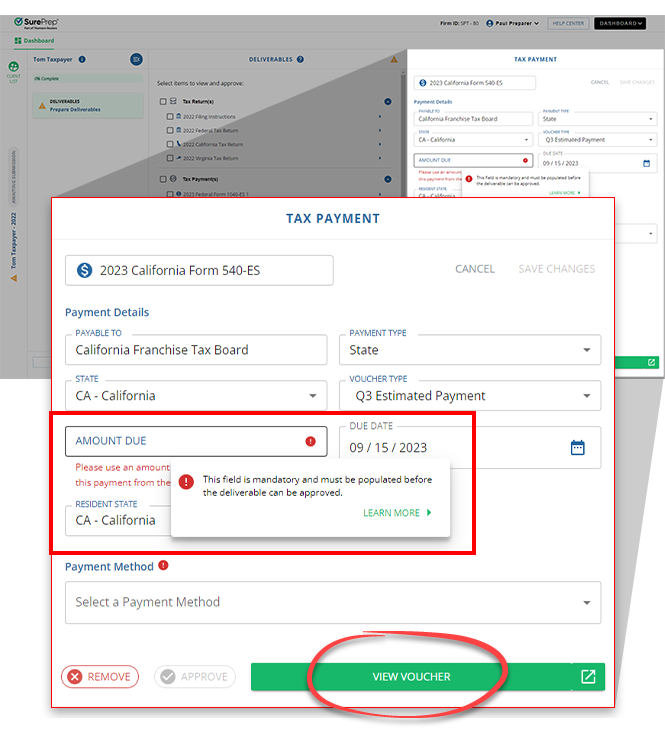
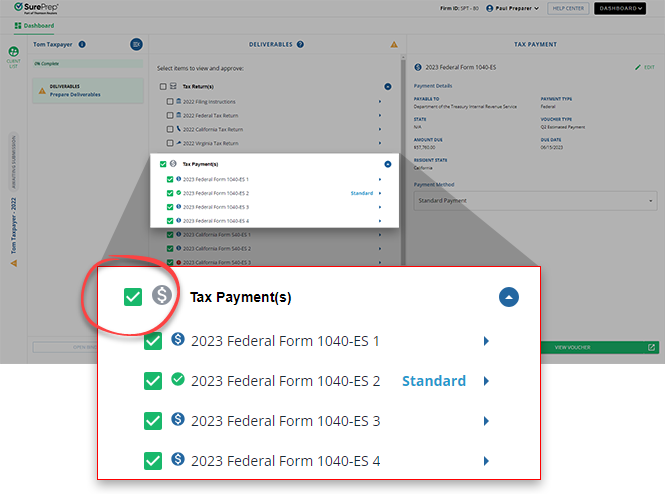
 | Official Voucher (Pending Approval) | Can be mailed to the taxing authority and Marked as Paid in TaxCaddy.Next steps: 1. Select Payment Method to prepare for approval.2. Approve deliverables. |
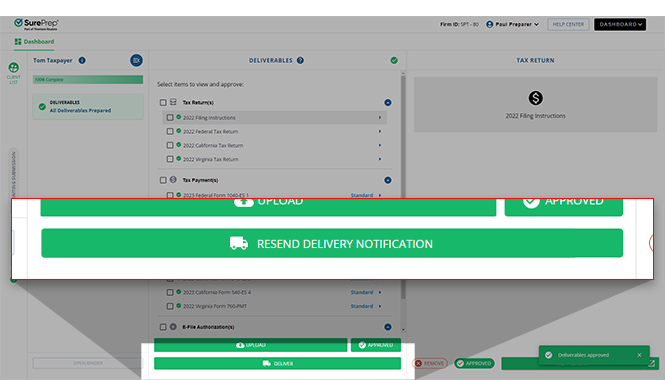
 | Approved for Delivery | Tax Payment Voucher is approved and marked for delivery. Next step: After all the deliverables are approved, send the deliverables to your client. |
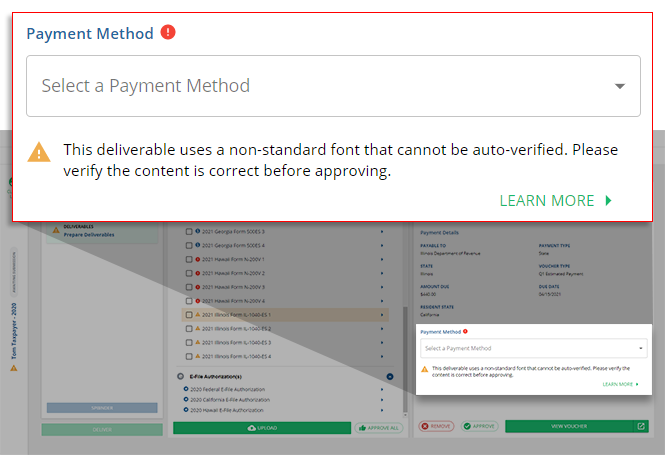
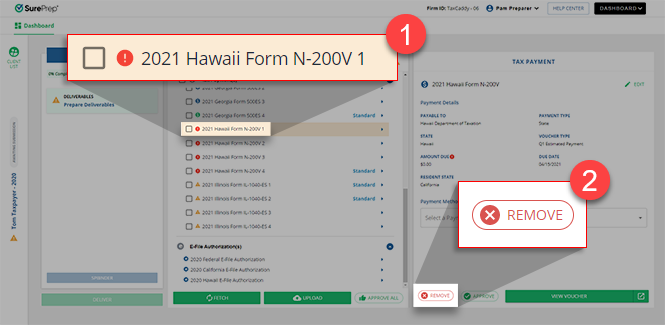
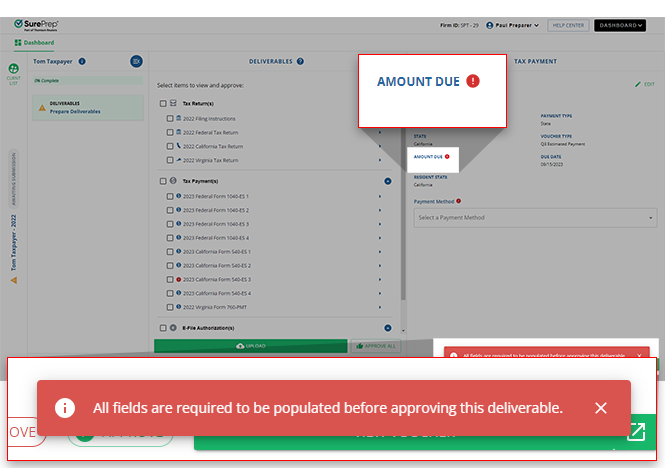
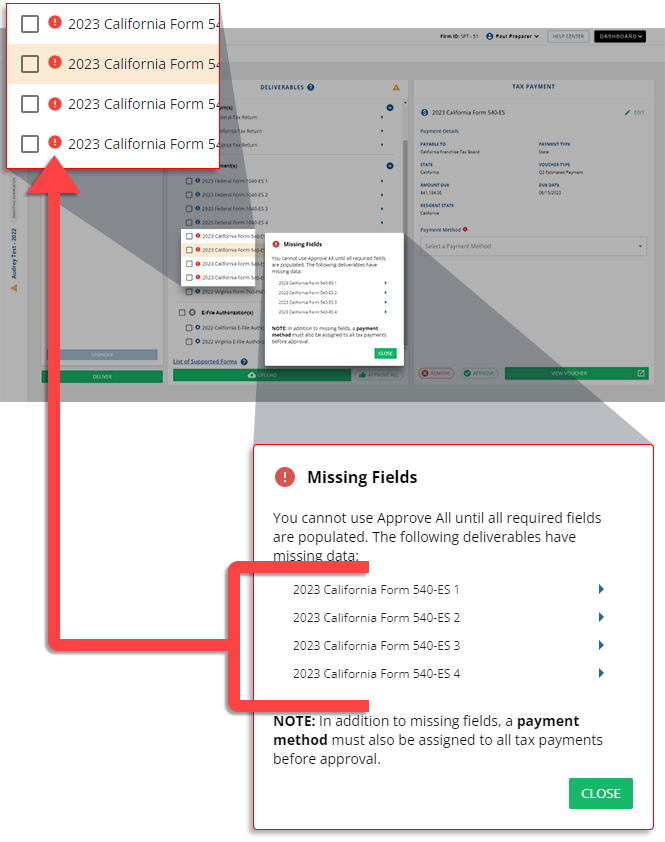
Missing Field | This field is mandatory and must be populated and verified before the deliverable can be approved. | |
Requires Attention | If the tax return was uploaded using Split Deliverables then some fields on the Tax Payment Voucher need to be verified (for example, the deliverable uses a non-standard font).Also appears if the deliverables were fetched and can't be mailed to the tax authority. The tax payment voucher is only available for record-keeping purposes to be Marked as Paid in TaxCaddy. |
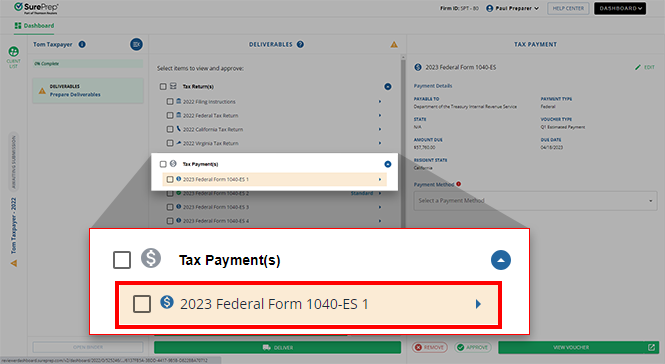
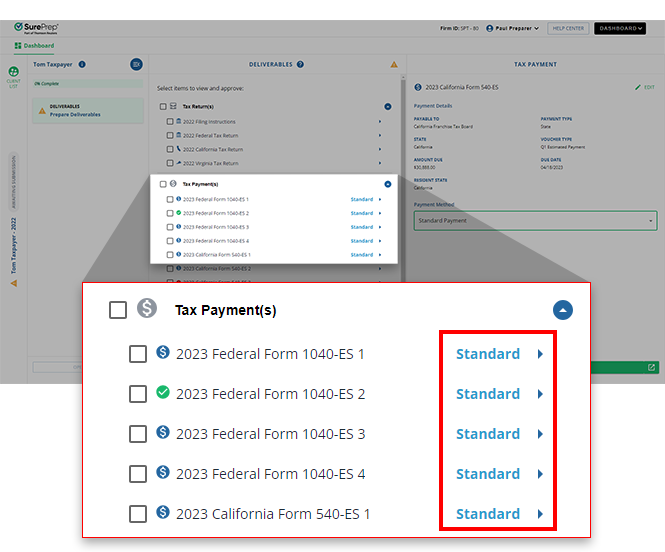
 icon. To approve and deliver all the deliverables, you must address all Tax Payment Vouchers with
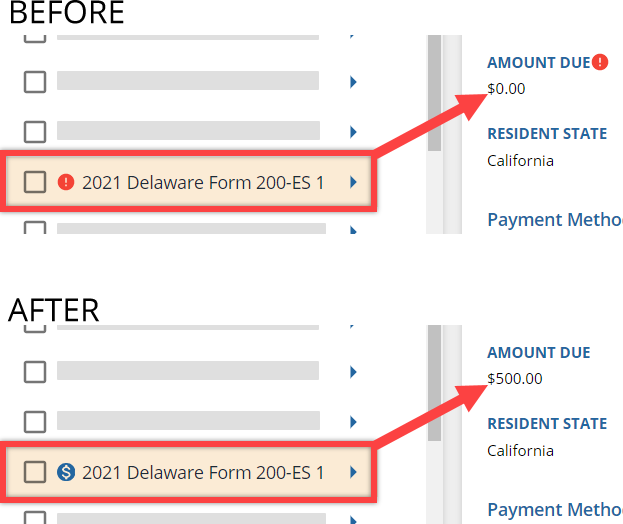


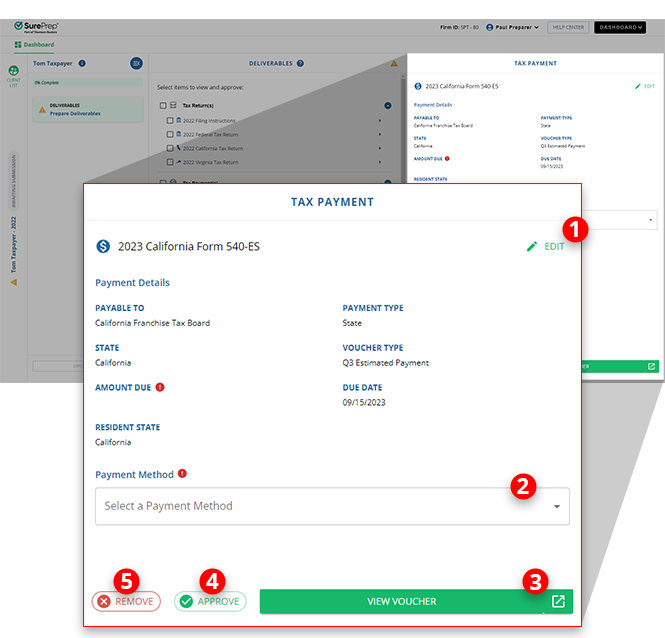
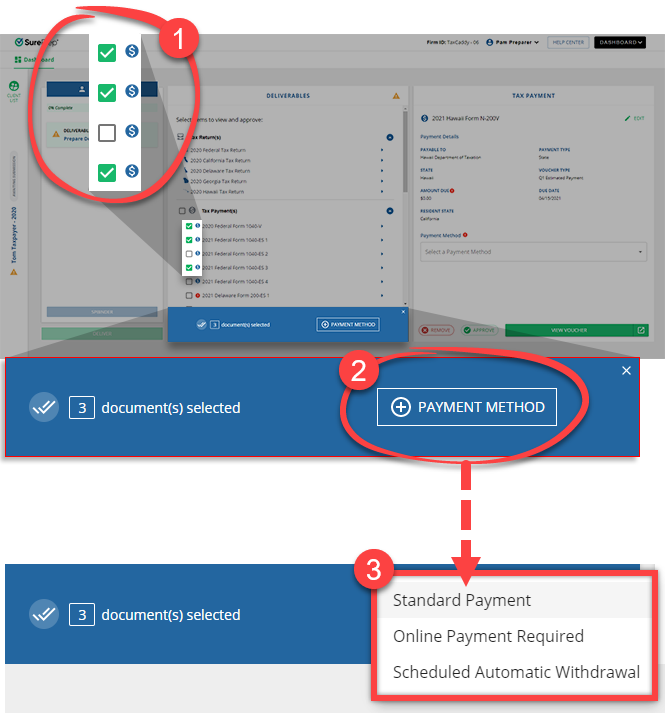
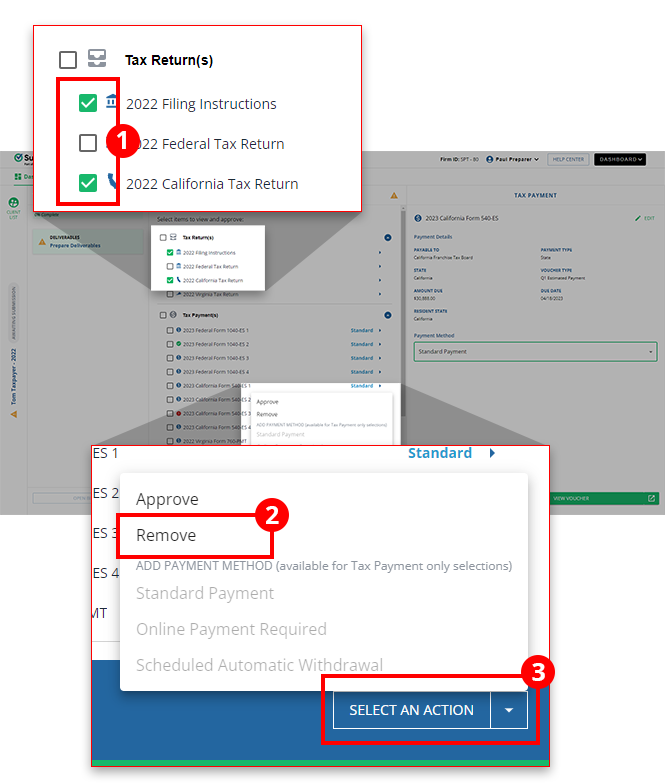
Payment Method | Description |
|---|---|
Standard Payment | Indicates to the taxpayer they can make their payment using their preferred method. This includes, if applicable, the ability to pay by check through TaxCaddy. If the taxpayer made the payment without using TaxCaddy, then you or the taxpayer can mark the tax payment as paid. |
Online Payment Required | It indicates to the taxpayer that this payment should be paid online and should not be mailed in. |
Scheduled Automatic Withdrawal | It Indicates to the taxpayer that this payment has already been scheduled for automatic withdrawal or payment. You or the taxpayer can mark the tax payment as paid once they have verified the payment has been processed. |


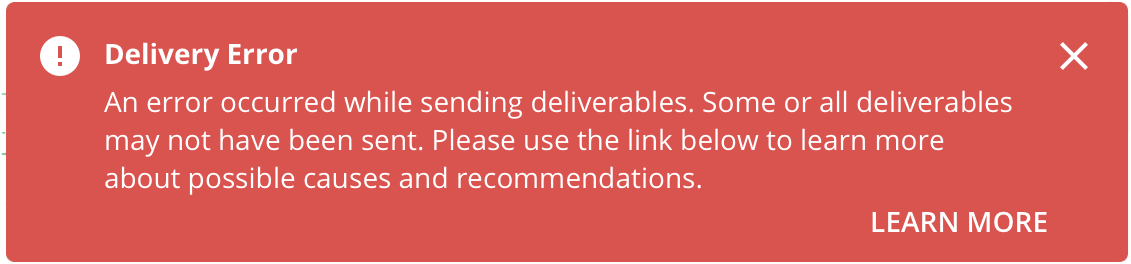
Message | Cause |
|---|---|
You must be assigned to a user group with the Can Deliver permissions enabled. | You are assigned to a user group that doesn’t have the ' Can Deliver permission enabled. |
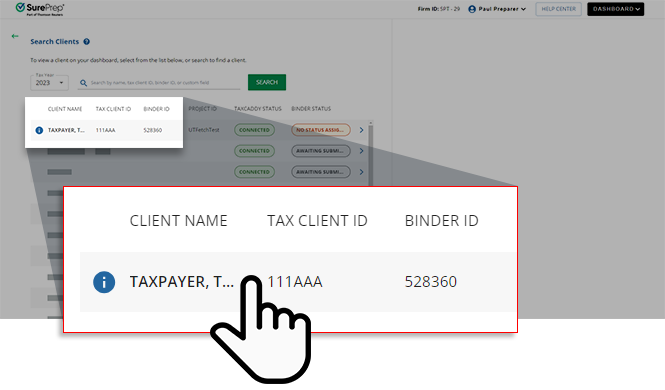
This client record is for a FileRoom binder that is not linked to a TaxCaddy client profile. Please link this client's binder to a TaxCaddy client profile. | The client you selected in the Reviewer Dashboard is a binder, this (binder) client doesn’t have a TaxCaddy Client linked to it. To send deliverables, you need to add your client to TaxCaddy. If the client already exists in TaxCaddy, link this binder client to their counterpart in TaxCaddy profile, then try again. If the client doesn’t exist in TaxCaddy, create a client in TaxCaddy, then link this binder client to their counterpart in TaxCaddy profile. |
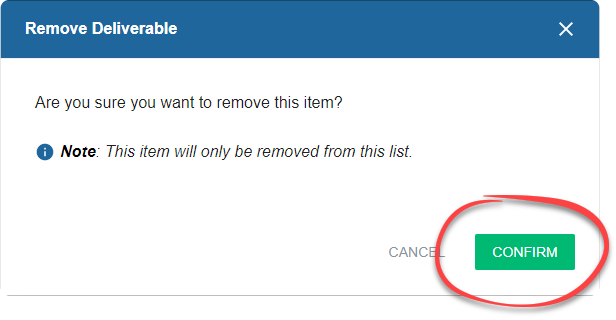
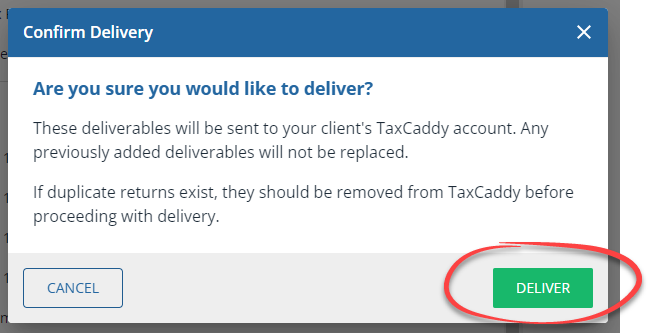
Deliverables not approved. Mark the deliverables as approved, then try again. | First approve the deliverables, then initiate the delivery. Deliverables you don't want to approve can be removed. |
Client has a '[Invalid Status] ' status. | Client's status is incompatible for delivery. Offline : Since you can't send deliverables to Offline clients. The Offline status in TaxCaddy is incompatible. Disconnected / Connected Elsewhere : Clients that are disconnected or connected elsewhere can't be sent deliverables. |
To send deliverables to an unconnected taxpayer, you'll need to have a phone number listed in TaxCaddy's Client Management for this client. | A standard client is not connected and does not have the client's mobile phone number on record. Go to Client Management , edit the client record with the correct email address and mobile phone number, then Deliver again. |
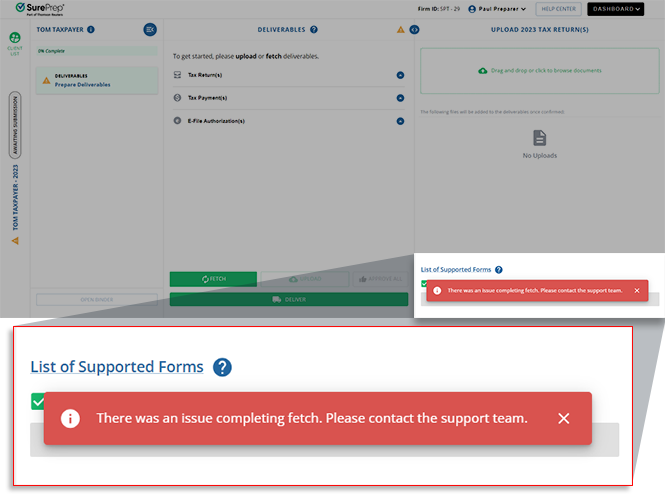
Previous delivery is currently in progress, try again later. | The previous delivery is in the queue and will be sent soon. Please wait and try again later. If you are still unable to send new deliverables after some time, then contact SurePrep Support for help. |
Tax Software | Upload/Split Deliverables
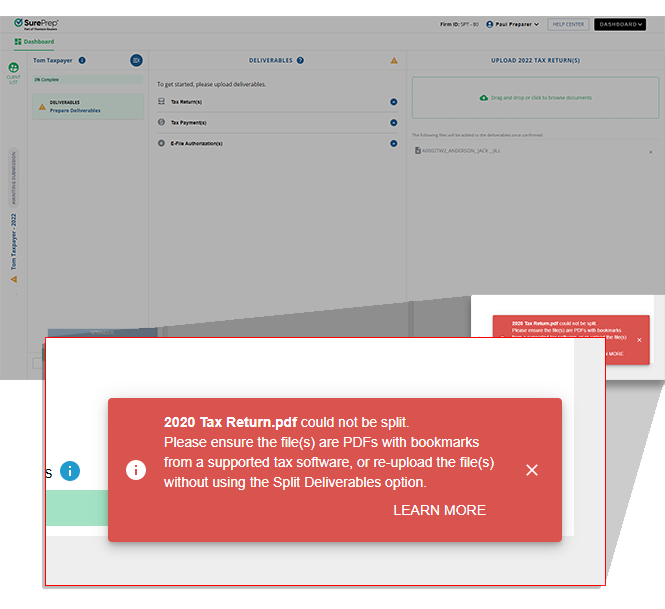
* Client must have a tax software on record in Client Management . † The Split deliverables feature doesn’t separate federal & state tax returns PDFs that were printed from Lacerte tax software. ------------------- Fetch button
|
Binder Type |
|
TaxCaddy Client Status | You can send deliverables to Standard client records with the following status:
* Clients without user credentials (i.e. password) can access their deliverables using a Dynamic Password link sent to their email and a verification code sent to their mobile phone after they select the link. |
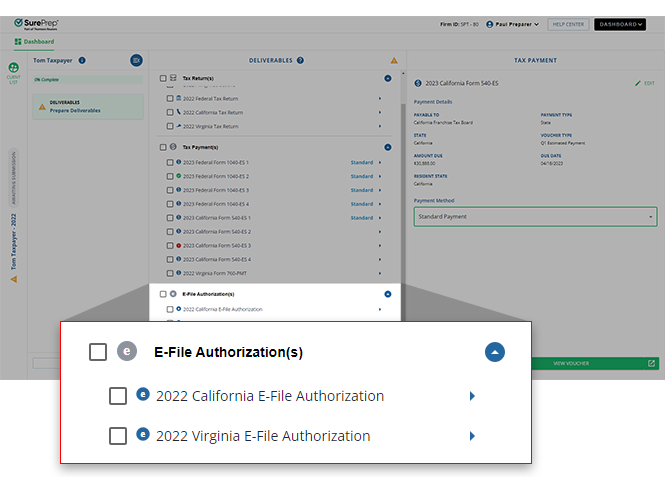
Deliverables | Deliverables have to be approved and not yet delivered. |
User Group Permissions | Users must have the Can Deliver permissions enabled in Account Admin. |