
![]()
Triva isn't available right now.
Check out the support page for our phone number and hours
![]()


Field | Description |
|---|---|
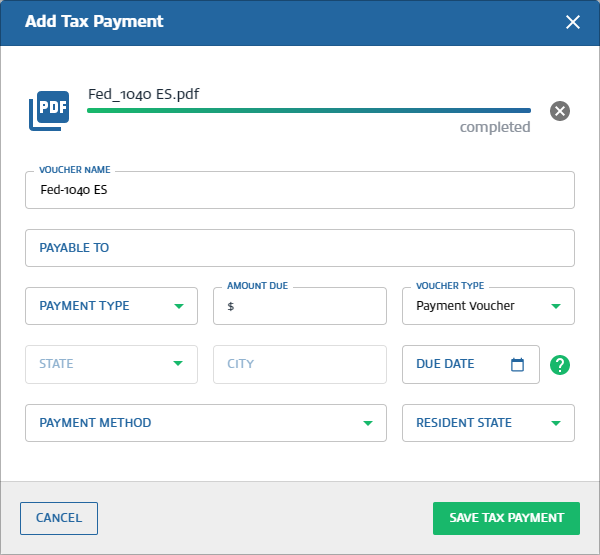
Voucher Name | Enter an identifiable voucher name. |
Payable To | Enter the name of the taxing authority (that is, IRS, Franchise Tax Board). |
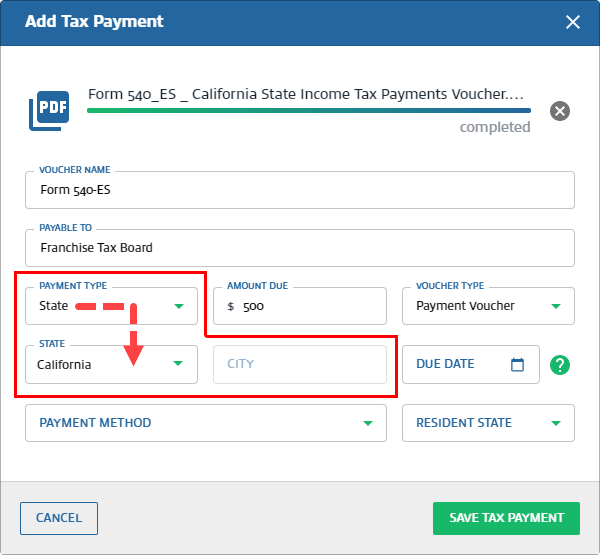
Payment Type | Select between Federal, State, City, or Other. |
Amount Due | Enter the amount due to the taxing authority. The amount due value must be greater than $0. |
Voucher Type | Select if this is a standard, estimated, or extension tax payment voucher. |
Field | Description |
|---|---|
State | This field is enabled when the Payment Type field is a State . Select the state where the tax payment is due. |
City | This field is enabled when the Payment Type field is a City . Enter the city name where the tax payment is due. |
Field | Description |
|---|---|
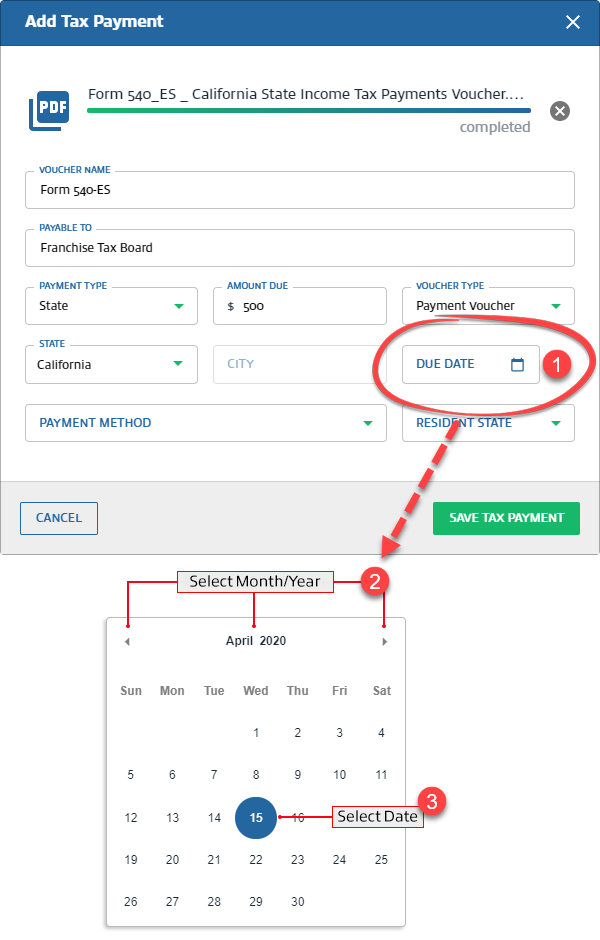
Due Date | Select the tax payment due date. |
Tax Payment Voucher type | Uploaded to |
|---|---|
Standard Payment Vouchers | Due Date Year - 1 year |
Estimated Payment Vouchers, due February 1-December 31 | Same Year as the Due Date |
Estimated Payment Vouchers, due January 1-January 31 | Due Date Year - 1 year |
Extension Payment Vouchers | Due Date Year - 1 year |
Field | Description |
|---|---|
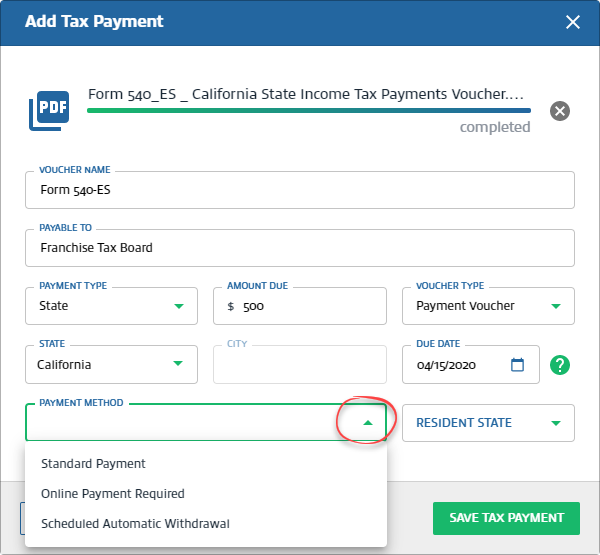
Payment Method | Select from the following payment methods: Standard Payment : It indicates to the taxpayer that they can make their payment using their preferred method. This includes the ability to pay by check through TaxCaddy. If the taxpayer made the payment without using TaxCaddy, then you or the taxpayer can mark the tax payment as paid.Online Payment Required : It indicates to the taxpayer that this payment should be paid online, and not be mailed in.Scheduled Automatic Withdrawal : It indicates to the taxpayer that this payment has already been scheduled for automatic withdrawal or payment, and that they should mark it as paid once they’ve verified the payment has been processed. |
Resident State | Select the taxpayer's home state. |


From | To |
|---|---|
Earliest available tax year + 1 year. | Most recent available tax year + 1 year. |
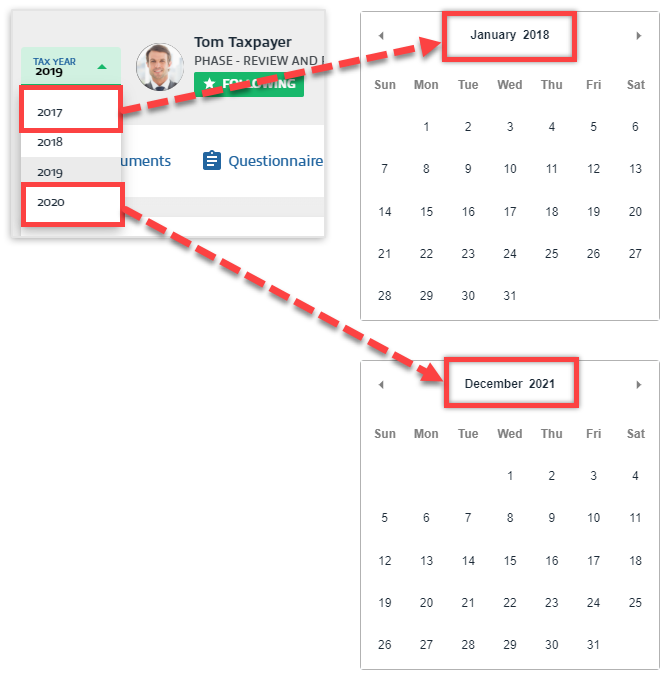
From | To |
|---|---|
Starting March 1 of the earliest available tax year. | Ending February 29 of the most recent available tax year + 1 year. |

Firm settings | Tax payment processing by mail must be enabled. |
|---|---|
Payment Method (field) | Standard |
Payment Type (field) | Federal or State |
Resident State (field) | Required |
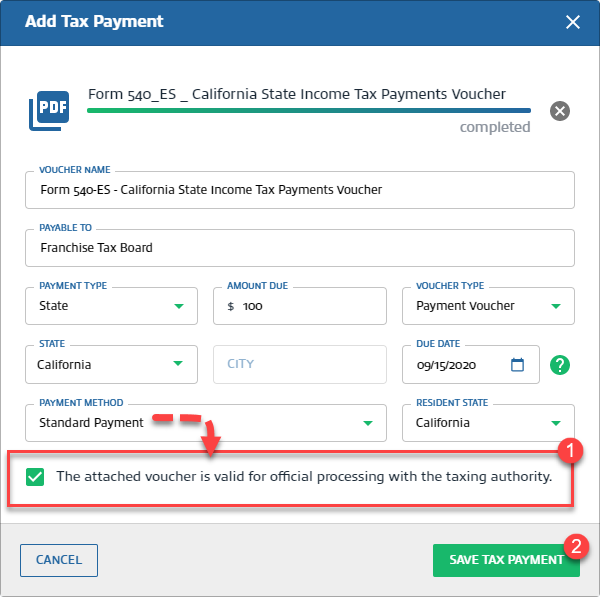
The attached voucher is valid for official processing with the taxing authority checkbox. | Required. The checkbox appears after you select the Payment Method field as Standard . |

 Article,
6 min read
Article,
4 min read
Article,
3 min read
Article,
3 min read
Article,
5 min read
Article,
3 min read
Article,
3 min read
Article,
6 min read
Article,
4 min read
Article,
3 min read
Article,
3 min read
Article,
5 min read
Article,
3 min read
Article,
3 min read